Managing Product Categories and Attributes
How to add/edit product categories
Categories are managed from the Products > Categories screen.
Similar to categories on your posts in WordPress, you can add, delete, and edit product categories.
Add a Name.
Add a Slug (optional); this is the URL-friendly version of the name.
Choose a Parent if this is a subcategory.
Enter a Description (optional); some themes display this.
Choose the Display type. Decide what is shown on the category’s landing page. “Standard” uses your theme’s default. “Subcategories” will display only the subcategories. “Products” only displays products. “Both” will display subcategories and products below that.
Upload/Add Image (optional); Some themes have pages where product category images are displayed, so this is a good idea.
Example: Storefront by default displays product category images on the homepage template.

Categories can also be reordered by dragging and dropping – this order is used by default on the front end whenever the categories are listed. This includes both widgets and the category/subcategory views on product pages.

Every product must be assigned to a category, so the default “Uncategorized” category will be automatically assigned if the product is not assigned to any other category.
You can also switch the default category using the row actions underneath the category name, then the “Uncategorized” category can be deleted as it is no longer the default.

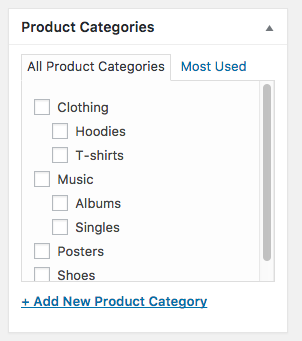
When you add a new product via Products > Add Product, you can select this new product category from the list.
Alternatively, you can go to Products > Add Product directly, and select Add New Product Category.im

How to add/edit product attributes
Set global attributes
Go to Products > Attributes to add, edit, and remove attributes. Here you can quickly and easily add attributes and their terms.
Select Add Attribute. The attribute is added in the table on the right, but without values.
Select the “Configure terms” text to add attribute values.

Next, Add New “Attribute name”, where “Attribute name” automatically takes the name you gave the attribute in the previous step. If you selected “Custom ordering” for the attribute, reordering your values can be done here.
Add global attributes to product
Add the created attributes to your products.
Go to: Products > Add Product (or edit an existing one).
Select the Attributes tab in the Product Data. There you can choose any of the attributes that you’ve created in the dropdown menu.
Select Add.
If you selected a global attribute that you previously created, you can select terms that you added previously.

Add custom attributes
Alternatively, add an attribute you only want to use for one product. This would only be ideal if you have a product with unique variations.
Go to: Product > Add Product.
Select the Attributes tab.
Select Custom product attribute in the dropdown and follow the above steps.
Last updated